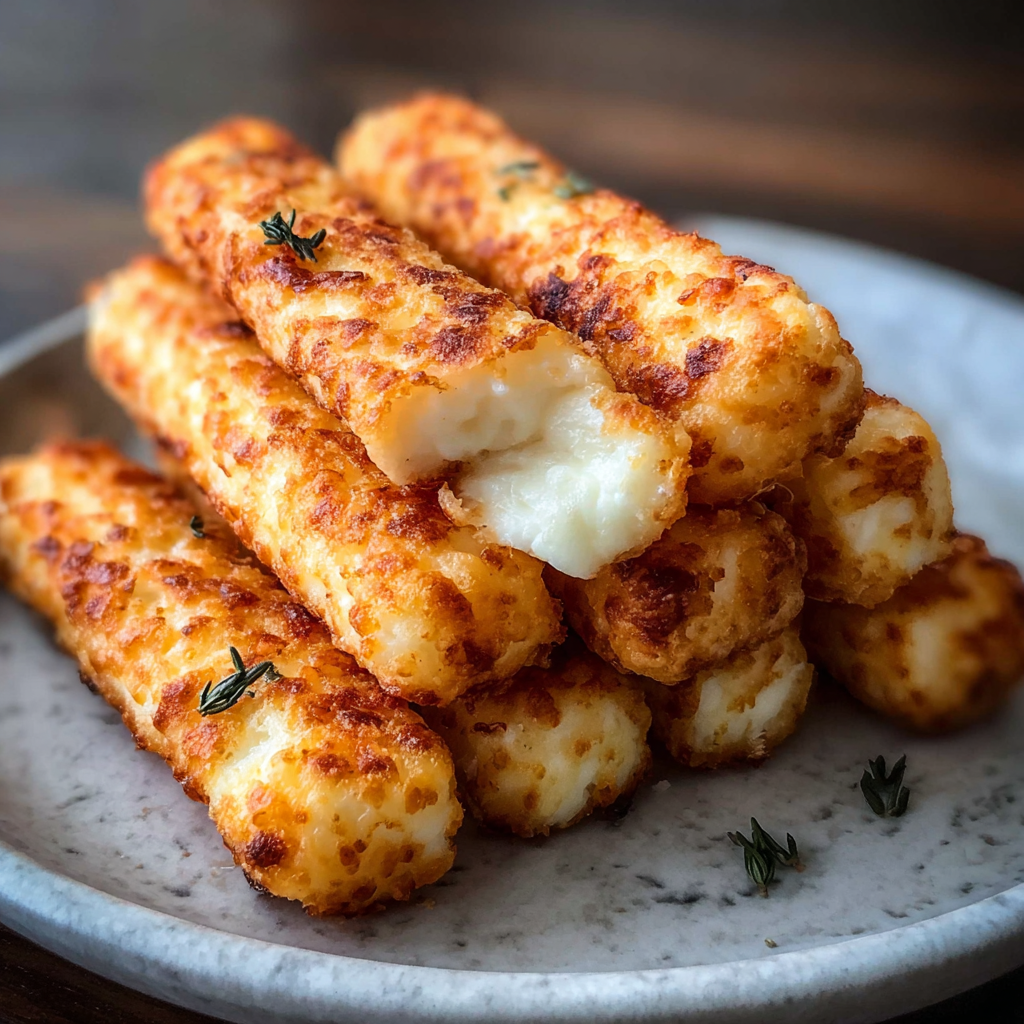
Deliciously Cheesy Cottage Cheese Sticks

If you’re on the hunt for the ultimate snack to satisfy both your crunchy cravings and love for creamy cheese, look no further than Deliciously Cheesy Cottage Cheese Sticks. These delightful bites combine the crispy exterior with a rich, cheesy center that’s packed with fresh, tangy cottage cheese, creating a flavor combo that’s truly irresistible. Whether you’re serving them at a party, grabbing a quick bite, or just craving something different, these sticks bring a perfect balance of texture and taste that will keep you coming back for more.
Why You’ll Love This Recipe
- Perfect balance: Crispy on the outside and creamy on the inside for maximum texture satisfaction.
- Wholesome ingredients: Made with cottage cheese to add protein and a fresh, tangy flavor.
- Quick and easy: Simple ingredients and straightforward steps mean you can whip them up in no time.
- Versatile snack: Great as an appetizer, party food, or a kid-friendly treat.
- Customizable flavors: Easy to tweak with herbs and spices to suit any palate.
Ingredients You’ll Need
Crafting the perfect Deliciously Cheesy Cottage Cheese Sticks is all about using a handful of simple but essential ingredients. Each one plays a vital role in developing that crisp crust, creamy center, and irresistible cheesy taste you’ll adore.
- Cottage cheese: The creamy star that provides protein and a smooth texture.
- Shredded cheese: Adds richness and enhances the cheesy flavor inside the sticks.
- Breadcrumbs: Creates the golden, crispy coating that seals in moisture and crunch.
- Eggs: Acts as a binding agent to hold everything neatly together.
- Garlic powder: Infuses a subtle punch of flavor that complements the cheese beautifully.
- Fresh herbs: Adds bright, fresh notes and an appealing aroma.
- Salt and pepper: Essential seasonings to balance and lift all the flavors perfectly.
Variations for Deliciously Cheesy Cottage Cheese Sticks
One of the best things about Deliciously Cheesy Cottage Cheese Sticks is how easily you can tailor them to your taste or dietary needs. Whether you want to boost the spice, sneak in extra veggies, or swap ingredients for a healthier spin, it’s all simple and fun.
- Spicy kick: Add red pepper flakes or cayenne to breadcrumbs for a subtle heat.
- Herb boost: Mix in basil, oregano, or thyme instead of or in addition to parsley for fresh herbal notes.
- Gluten-free option: Use gluten-free breadcrumbs or crushed nuts for a crunchy coating.
- Vegetable infusion: Finely grate zucchini or carrot into the mixture to add nutrition and moisture.
- Cheesy blend: Experiment with different cheeses like mozzarella, cheddar, or Parmesan for varied flavors.
How to Make Deliciously Cheesy Cottage Cheese Sticks
Step 1: Prepare the cheese mixture
Start by gently mixing cottage cheese with shredded cheese, garlic powder, herbs, salt, and pepper until evenly combined, creating a flavorful and creamy filling.
Step 2: Form the sticks
Using your hands, shape the cheese mixture into small, even sticks or logs, ensuring they are compact enough to hold their shape during cooking.
Step 3: Coat the sticks
Set up a dredging station with beaten eggs and breadcrumbs. Dip each stick first into the egg, letting excess drip off, then roll it thoroughly in breadcrumbs for a crunchy coating.
Step 4: Cook to perfection
Either bake the sticks in a preheated oven until golden and crisp or shallow fry them in hot oil for a perfectly crunchy exterior and melty interior.
Step 5: Drain and serve
Remove the cooked sticks and place them on paper towels to absorb any excess oil, then serve warm with your favorite dipping sauce.
Pro Tips for Making Deliciously Cheesy Cottage Cheese Sticks
- Use full-fat cottage cheese: It offers richer flavor and creamier texture than low-fat versions.
- Chill before cooking: Refrigerate formed sticks for 30 minutes so they hold their shape better during cooking.
- Don’t skimp on breadcrumbs: A thick coating is key to achieving that satisfying crispy crunch.
- Try a mix of cheeses: Combining mozzarella and Parmesan creates a gooey yet flavorful interior.
- Use a thermometer for frying: Keep oil temperature around 350°F to cook evenly without burning.
How to Serve Deliciously Cheesy Cottage Cheese Sticks
Garnishes
Sprinkle freshly chopped parsley, chives, or a little grated Parmesan on top to add color and an extra flavor boost right before serving.
Side Dishes
Pair these sticks with tangy marinara sauce, creamy ranch dip, or a zesty yogurt-based dip for dipping goodness that elevates the snack experience.
Creative Ways to Present
Serve them on a wooden board with a variety of dips and colorful veggies for a visually inviting snack platter perfect for parties or casual gatherings.
Make Ahead and Storage
Storing Leftovers
Place any leftover Deliciously Cheesy Cottage Cheese Sticks in an airtight container and refrigerate for up to 3 days, keeping them fresh for snacking later.
Freezing
Freeze unbaked sticks on a lined tray until solid, then transfer to a freezer bag; cook from frozen by adding a few extra minutes to the cooking time for convenience.
Reheating
Reheat oven-baked sticks in a preheated oven at 350°F for 8-10 minutes to restore crispiness without drying out the creamy center.
FAQs
Can I make Deliciously Cheesy Cottage Cheese Sticks vegan?
Yes! Substitute cottage cheese with firm tofu or a plant-based cheese alternative, and use vegan breadcrumbs and egg replacements for coating.
What dips go well with these cheese sticks?
Classic choices include marinara, ranch, garlic aioli, or even a spicy sriracha mayo for an exciting twist.
Are these sticks suitable for kids?
Absolutely! Their mild, cheesy flavor and fun finger-food style make them a favorite among kids and adults alike.
Can I bake instead of frying?
Definitely—baking at 400°F for about 15-20 minutes yields crispy sticks with less oil and fuss.
How long do they take to prepare?
Preparation takes roughly 15 minutes, with an additional 15-20 minutes of cooking time, making it perfect for a quick homemade snack.
Final Thoughts
Deliciously Cheesy Cottage Cheese Sticks truly hit the spot whenever you need a snack that’s both crunchy and bursting with cheesy goodness. They’re simple to make, endlessly customizable, and satisfy cravings like no other snack can. So grab your ingredients, have fun experimenting with flavors, and share these golden, creamy delights with friends and family. Trust me, once you try them, they’ll become a new favorite in your snack rotation!
Related Posts
- Thanksgiving Potato Skins with Turkey and Stuffing
- Thanksgiving Egg Rolls with Turkey and Stuffing
- Easy Spicy Tuna Cakes

Deliciously Cheesy Cottage Cheese Sticks
- Prep Time: 15 minutes
- Cook Time: 15-20 minutes
- Total Time: 30-35 minutes
- Yield: 12-15 sticks 1x
- Category: Appetizers
- Method: Baking or Shallow Frying
- Cuisine: American
- Diet: Gluten Free (if using gluten-free breadcrumbs)
Description
Deliciously Cheesy Cottage Cheese Sticks are a perfect snack combining a crispy golden exterior with a creamy, tangy cottage cheese and shredded cheese center. Quick and easy to make, these versatile sticks serve well as appetizers, party snacks, or kid-friendly treats. Customize with various herbs, spices, or cheese blends for personalized flavor. Bake or fry for irresistible cheesy bites that satisfy crunchy and creamy cravings alike.
Ingredients
Main Ingredients
- 1 cup full-fat cottage cheese
- 1 cup shredded cheese (mozzarella, cheddar, or Parmesan blend)
- 1 cup breadcrumbs (use gluten-free if needed)
- 2 large eggs, beaten
- 1 teaspoon garlic powder
- 2 tablespoons fresh herbs (such as parsley, basil, oregano, or thyme), finely chopped
- Salt, to taste
- Black pepper, to taste
Instructions
- Prepare the cheese mixture: Start by gently mixing the cottage cheese with shredded cheese, garlic powder, fresh herbs, salt, and pepper until evenly combined, creating a flavorful and creamy filling.
- Form the sticks: Using clean hands, shape the cheese mixture into small, even sticks or logs. Ensure they are compact and firmly shaped to hold together during cooking.
- Coat the sticks: Set up a dredging station with beaten eggs and breadcrumbs. Dip each stick into the egg, allowing excess to drip off, then roll thoroughly in breadcrumbs to create a crunchy coating.
- Cook to perfection: Either bake the sticks in a preheated oven at 400°F (200°C) for 15-20 minutes until golden and crisp, or shallow fry them in hot oil (around 350°F/175°C) until the exterior is crunchy and the interior melts softly.
- Drain and serve: Remove the cooked sticks and place them on paper towels to absorb any excess oil, then serve warm with your favorite dipping sauce.
Notes
- Use full-fat cottage cheese for richer flavor and creamier texture.
- Chill formed sticks in the refrigerator for 30 minutes before cooking to help them hold their shape better.
- Don’t skimp on breadcrumbs; a thick coating is key for a satisfying crunchy crust.
- Try mixing different cheeses, such as mozzarella and Parmesan, for a gooey and flavorful interior.
- If frying, maintain the oil temperature around 350°F (175°C) to ensure even cooking without burning.
- For a gluten-free version, substitute regular breadcrumbs with gluten-free breadcrumbs or crushed nuts.
- Adding finely grated vegetables like zucchini or carrot to the mixture adds nutrition and moisture.
Nutrition
- Serving Size: 2 sticks
- Calories: 180
- Sugar: 1g
- Sodium: 350mg
- Fat: 12g
- Saturated Fat: 6g
- Unsaturated Fat: 4g
- Trans Fat: 0g
- Carbohydrates: 10g
- Fiber: 1g
- Protein: 10g
- Cholesterol: 90mg
Keywords: cheese sticks, cottage cheese sticks, cheesy snack, appetizer, gluten-free snack, party food, kid-friendly snack