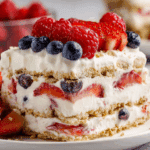
How to Make Berry Icebox Cake with Vanilla Layers
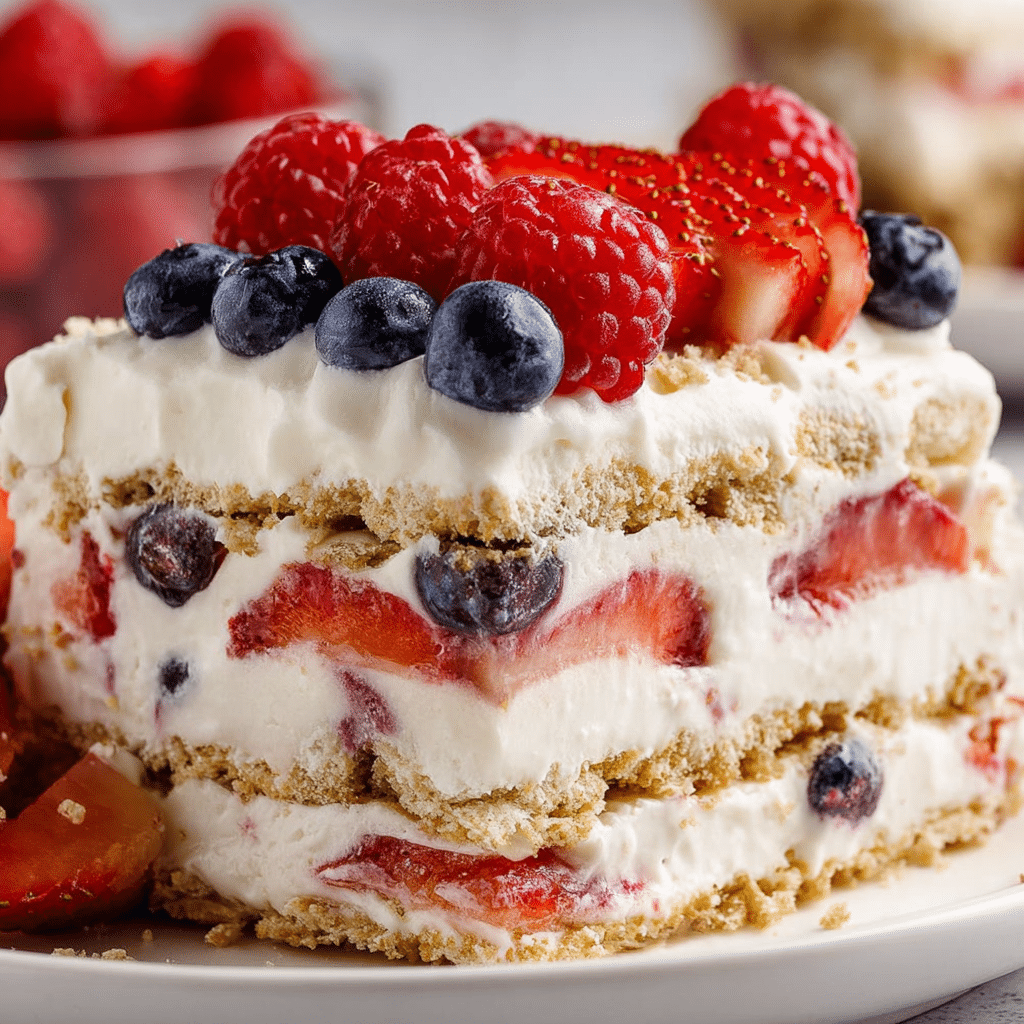
If you’re searching for a show-stopping dessert that’s as refreshing as it is simple to prepare, look no further than the Berry Icebox Cake with Vanilla Layers. This delightful treat combines luscious layers of creamy vanilla and freshly picked berries, creating a harmonious blend of flavors and textures that’s perfect for summer gatherings or anytime you need a quick, elegant dessert. Its no-bake approach means you can whip it up in no time, allowing the chilled layers to meld into a soft, heavenly experience that will have everyone asking for seconds.
Why You’ll Love This Recipe
- Effortless Preparation: No oven required, making it ideal for warm days or last-minute entertaining.
- Vibrant Flavor Profile: Fresh berries add a natural sweetness and a burst of color that’s irresistible.
- Flexible Ingredients: Easy to adapt with various berries or dairy-free options to suit any diet.
- Beautiful Presentation: Layered look makes it a standout dessert for any occasion.
- Perfect Texture: Creamy vanilla layers paired with crisp cookies soften over time for a melt-in-your-mouth sensation.
Ingredients You’ll Need
Gathering simple, wholesome ingredients is all you need to make this Berry Icebox Cake with Vanilla Layers truly shine. Each component plays a key role in balancing sweetness, creaminess, and freshness, so quality matters here.
- Fresh Mixed Berries: Choose a combination of strawberries, blueberries, raspberries, and blackberries for vibrant flavor and color.
- Vanilla Pudding Mix: Instant pudding adds creamy vanilla flavor while setting the layers perfectly.
- Whipped Cream: Use fresh or store-bought for fluffiness and richness.
- Graham Crackers or Vanilla Wafers: For a buttery, crisp texture that softens as the cake chills.
- Milk: Needed to prepare the pudding and harmonize the creaminess.
- Sugar (Optional): To lightly sweeten berries if desired for extra burst.
Variations for Berry Icebox Cake with Vanilla Layers
This Berry Icebox Cake with Vanilla Layers is wonderfully versatile, so feel free to tweak it to match your cravings or dietary needs. Whether you want to amplify the fruitiness or make it allergy-friendly, customizing is a breeze.
- Use Coconut Whipped Cream: A dairy-free alternative that pairs beautifully with berries.
- Add Citrus Zest: Mix lemon or orange zest into the vanilla pudding for a refreshing twist.
- Swap Cookies: Try chocolate wafers or gingersnaps for a richer flavor profile.
- Include Other Fruits: Peaches, mangoes, or kiwi add an exotic flair to your layers.
- Make It Vegan: Use plant-based milk and pudding mix with vegan-friendly whipped topping.

How to Make Berry Icebox Cake with Vanilla Layers
Step 1: Prepare the Vanilla Pudding
Start by whisking the instant vanilla pudding mix with cold milk according to package instructions until it thickens, then fold in freshly whipped cream gently to create a smooth, light layer perfect for assembling.
Step 2: Wash and Prepare Berries
Rinse your mixed berries thoroughly and pat dry. If some berries are larger, chop them into bite-sized pieces to ensure every bite gets a balanced taste of fruit and cream.
Step 3: Layer the Cake
In a rectangular or square dish, spread a thin layer of the vanilla pudding mixture, then cover with a layer of graham crackers or vanilla wafers. Add a generous layer of mixed berries next, followed by more pudding. Repeat until you finish all ingredients, ending with pudding and scattered berries on top.
Step 4: Chill the Cake
Cover the cake tightly with plastic wrap and refrigerate for at least 4 hours or overnight, allowing the cookies to soften and all the layers to meld into one delicious dessert.
Pro Tips for Making Berry Icebox Cake with Vanilla Layers
- Use Fully Chilled Ingredients: Cold milk and whipped cream help the pudding set properly and keep the dessert fresh longer.
- Don’t Overmix Pudding and Cream: Fold gently to keep the layers light and airy rather than dense.
- Layer Evenly: Consistent layers ensure every slice has balanced flavors and textures.
- Choose Fresh, Ripe Berries: Quality berries make a huge difference in taste and appearance.
- Plan Ahead: This dessert tastes best after chilling overnight, giving it time to develop full flavor.
How to Serve Berry Icebox Cake with Vanilla Layers
Garnishes
Add a final flourish by sprinkling fresh mint leaves or a dusting of powdered sugar on top to enhance the visual appeal and add a little extra zing to the flavor.
Side Dishes
Serve alongside light, refreshing options like lemon sorbet, a scoop of vanilla ice cream, or even a simple green salad for an elegant summer menu.
Creative Ways to Present
Try assembling individual portions in mason jars for cute, portable servings, or create a layered trifle glass for a stunning centerpiece everyone can admire before digging in.
Make Ahead and Storage
Storing Leftovers
Keep any leftovers covered in the refrigerator for up to 3 days. The cake tends to soften with time but remains delicious and refreshing.
Freezing
While freezing isn’t ideal as it can alter texture, you can freeze the assembled cake in an airtight container for up to 1 month; thaw overnight in the fridge before serving.
Reheating
This dessert is best served chilled and doesn’t require reheating. Simply remove from the refrigerator and serve cold for maximum freshness.
FAQs
Can I use frozen berries for this cake?
Yes, but it’s best to thaw and drain frozen berries thoroughly to avoid excess moisture that can make the cake soggy.
Is it possible to make this dessert gluten-free?
Absolutely! Use gluten-free vanilla wafers or gluten-free graham crackers for a delicious gluten-free version.
Can I prepare this cake without instant pudding mix?
While instant pudding mix simplifies the process, you can make homemade vanilla pudding to keep the creamy layers rich and smooth.
How long does the cake last in the fridge?
Stored in an airtight container, it stays fresh and tasty for 3 days, perfect for making ahead for events.
What other fruits work well besides berries?
Stone fruits like peaches, nectarines, or even citrus segments can be great substitutes or additions to personalize your cake.
Final Thoughts
The Berry Icebox Cake with Vanilla Layers is an absolute delight that balances ease with elegance. Its fresh berries, creamy vanilla layers, and soft cookie textures come together in a luscious dessert you’ll want to make again and again. If you’re looking for a crowd-pleasing recipe that requires minimal effort yet delivers maximum flavor, this is your go-to. Dive in, share with friends, and savor every bite of this summery favorite.
Related Posts
- Easy No-Bake Chocolate Rice Krispie Cookies Recipe
- Easy Fruit Pizza with Sugar Cookie Crust Recipe
- Why Paleo Coffee Popsicles Are Perfect Summer Treats
Berry Icebox Cake with Vanilla Layers
- Prep Time: 15 minutes
- Cook Time: 0 minutes
- Total Time: 4 hours 15 minutes (including chilling time)
- Yield: 8-10 servings
- Category: Dessert
- Method: No Bake
- Cuisine: American
- Diet: Gluten Free (if using gluten-free cookies)
Description
Berry Icebox Cake with Vanilla Layers is a no-bake, refreshing dessert featuring layers of creamy vanilla pudding, whipped cream, crisp cookies, and fresh mixed berries. Perfect for warm days or elegant summer gatherings, this easy-to-make treat combines vibrant flavors and soft textures for a crowd-pleasing finish.
Ingredients
Fruit
- Fresh Mixed Berries (strawberries, blueberries, raspberries, blackberries) – quantity to preference (about 3 cups)
- Sugar (optional, for lightly sweetening berries) – 1-2 tablespoons
Vanilla Layers
- Instant Vanilla Pudding Mix – 1 package (3.4 oz)
- Milk – 2 cups (cold, for pudding mix)
- Whipped Cream – 1 cup (fresh or store-bought)
Cookies
- Graham Crackers or Vanilla Wafers – 2 to 3 sleeves (about 8-10 oz)
Instructions
- Prepare the Vanilla Pudding: Whisk the instant vanilla pudding mix with cold milk according to package instructions until the pudding thickens. Gently fold in the whipped cream to create a smooth, light vanilla layer ideal for assembling the cake.
- Wash and Prepare Berries: Rinse the mixed berries thoroughly and pat them dry. Chop any larger berries into bite-sized pieces to ensure an even distribution of fruit in each bite.
- Layer the Cake: In a rectangular or square dish, spread a thin layer of the vanilla pudding mixture. Cover with a layer of graham crackers or vanilla wafers. Add a generous layer of mixed berries, then more pudding. Repeat layering until all ingredients are used, finishing with a pudding layer topped with scattered berries.
- Chill the Cake: Cover the assembled cake tightly with plastic wrap and refrigerate for at least 4 hours or overnight. This allows the cookies to soften and all flavors to meld into one delicious dessert.
Notes
- Use fully chilled milk and whipped cream to help the pudding set properly and keep the dessert fresh longer.
- Fold pudding and whipped cream gently to retain light, airy layers instead of dense mixtures.
- Layer ingredients evenly to guarantee balanced flavor and texture in every slice.
- Choose fresh, ripe berries for the best taste and visual appeal.
- For optimum flavor, chill the cake overnight before serving.
Nutrition
- Serving Size: 1 slice (about 1/10th of the cake)
- Calories: 250
- Sugar: 20g
- Sodium: 150mg
- Fat: 12g
- Saturated Fat: 7g
- Unsaturated Fat: 3g
- Trans Fat: 0g
- Carbohydrates: 30g
- Fiber: 3g
- Protein: 3g
- Cholesterol: 25mg
Keywords: no-bake, icebox cake, vanilla pudding, mixed berries, summer dessert, easy dessert, layered cake, gluten-free option