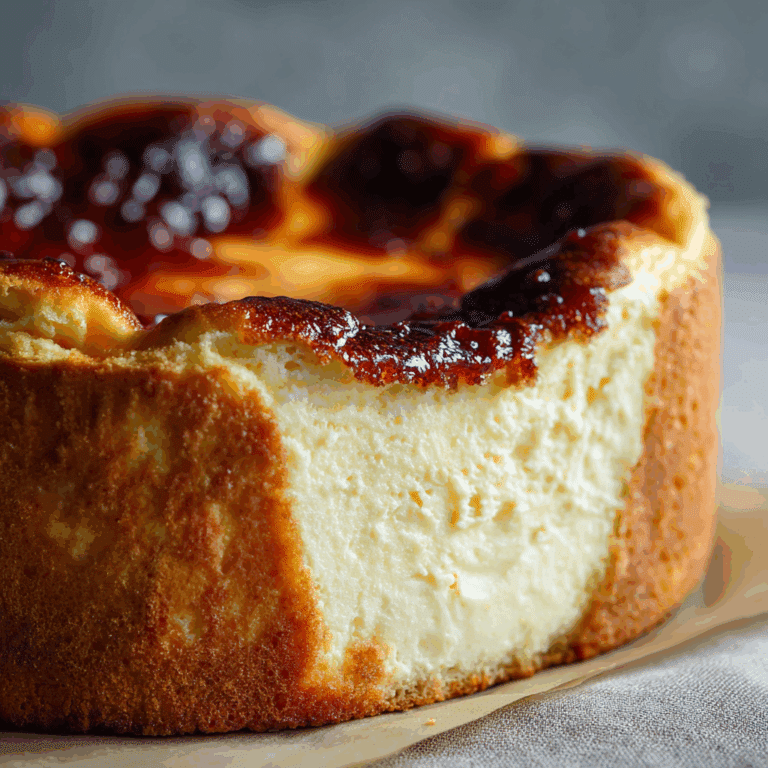
Brownie Bottom Mini Cheesecakes

Brownie Bottom Mini Cheesecakes bring together the best of two worlds: the fudgy richness of brownies and the creamy smoothness of cheesecake, all packed into bite-sized treats that are perfect for any occasion. These delightful desserts are not only visually appealing but explode with flavor from the first bite, making them an irresistible favorite for dessert lovers everywhere.
Why You’ll Love This Recipe
- Decadent Dual Texture: Enjoy the perfect balance between a fudgy brownie base and silky cream cheese topping.
- Perfectly Portable: Mini-sized portions make them easy to serve at gatherings or enjoy as a quick sweet fix.
- Simple Ingredients: Made with pantry staples that come together quickly without sacrificing flavor.
- Customizable: Easily adapted to add your favorite flavors or toppings for a personalized treat.
- Impresses Everyone: A crowd-pleaser that suits all ages and occasions without needing professional baking skills.
Ingredients You’ll Need
This recipe uses straightforward ingredients that each play a crucial role in creating the rich taste, moist texture, and creamy finish that make Brownie Bottom Mini Cheesecakes so special.
- Brownie Mix: The base for the fudgy layer providing deep chocolate flavor and chewy texture.
- Cream Cheese: Adds the creamy, tangy cheesecake layer that contrasts beautifully with the brownies.
- Sugar: Sweetens the cheesecake filling just right without overpowering the flavors.
- Eggs: Binds and stabilizes both the brownie and cheesecake layers for perfect consistency.
- Vanilla Extract: Enhances the flavor depth, giving that warm, inviting aroma.
- Sour Cream or Heavy Cream: Adds richness and smooth texture to the cheesecake topping.
Variations for Brownie Bottom Mini Cheesecakes
Feel free to play around with this recipe to match your taste buds or dietary requirements. It’s amazingly flexible, making it perfect to customize.
- Nutty Twist: Add chopped walnuts or pecans to the brownie base for extra crunch.
- Fruit Infusion: Swirl raspberry or strawberry jam into the cheesecake layer for a fruity burst.
- Chocolate Lovers: Sprinkle mini chocolate chips over the brownie bottom before baking.
- Gluten-Free Option: Use gluten-free brownie mix to keep these treats safe for sensitive diets.
- Vegan Adaptation: Substitute dairy and eggs with plant-based alternatives for a vegan-friendly dessert.

How to Make Brownie Bottom Mini Cheesecakes
Step 1: Prepare the Brownie Base
Start by mixing your favorite brownie mix according to the package instructions or homemade recipe. Spoon the batter evenly into a greased mini muffin tin, filling each cavity halfway to create the perfect base layer.
Step 2: Make the Cheesecake Filling
In a separate bowl, beat the cream cheese until smooth, then add sugar, eggs, vanilla, and sour cream. Mix until everything is fully combined and creamy without lumps.
Step 3: Assemble the Mini Cheesecakes
Carefully spoon the cheesecake filling over each brownie base in the muffin tin, filling almost to the top but leaving some space to allow for slight rising.
Step 4: Bake to Perfection
Bake at 325°F (163°C) for about 18–22 minutes, or until the cheesecake layer is set but still soft. Avoid overbaking to preserve that creamy texture.
Step 5: Cool and Chill
Allow the mini cheesecakes to cool completely at room temperature, then transfer to the refrigerator to chill for at least two hours before serving for the best taste and texture.
Pro Tips for Making Brownie Bottom Mini Cheesecakes
- Room Temperature Ingredients: Use room temperature cream cheese and eggs for a smoother filling without lumps.
- Don’t Overfill: Leave some space in the muffin cups to prevent cheesecake overflow during baking.
- Use a Water Bath: For extra creamy results, place the muffin tin in a shallow water bath while baking.
- Test for Doneness: The cheesecake should be set around the edges but slightly jiggle in the center.
- Store Properly: Keep refrigerated to maintain freshness and texture until serving.
How to Serve Brownie Bottom Mini Cheesecakes
Garnishes
Top these adorable desserts with fresh berries, a drizzle of chocolate or caramel sauce, or a sprinkle of powdered sugar for a visually stunning finish that also adds extra flavor layers.
Side Dishes
Pair with a scoop of vanilla ice cream or a dollop of whipped cream to enhance richness and create a truly indulgent dessert experience.
Creative Ways to Present
Arrange Brownie Bottom Mini Cheesecakes on tiered dessert trays for parties, or serve individually in small decorative cups to impress guests with your presentation skills.
Make Ahead and Storage
Storing Leftovers
Place any leftover Brownie Bottom Mini Cheesecakes in an airtight container and refrigerate. They will stay fresh and delicious for up to 4 days without losing texture or flavor.
Freezing
You can freeze these mini cheesecakes by wrapping them tightly in plastic wrap and placing in a freezer-safe container. Freeze for up to 2 months and thaw overnight in the fridge before serving.
Reheating
For a warmed treat, allow your cheesecake to come to room temperature or microwave on low power for a few seconds; avoid overheating to keep the creamy texture intact.
FAQs
Can I make Brownie Bottom Mini Cheesecakes gluten-free?
Yes! Simply use a gluten-free brownie mix or homemade gluten-free brownie batter to ensure the entire dessert is safe for gluten-sensitive guests.
How long do these mini cheesecakes need to chill before serving?
For optimal texture and flavor, chilling the mini cheesecakes for at least two hours in the refrigerator is recommended.
Can I prepare these ahead of time for a party?
Absolutely! Brownie Bottom Mini Cheesecakes can be made a day or two in advance and stored in the fridge until serving.
Is it possible to make them vegan?
Yes, by substituting plant-based cream cheese, eggs, and dairy with suitable vegan alternatives, you can enjoy a vegan-friendly version.
What’s the best way to prevent the cheesecake from cracking?
Avoid overbaking and make sure not to mix the batter too vigorously; gentle mixing and controlled baking times help maintain a smooth surface.
Final Thoughts
If you’re searching for a dessert that combines indulgence with ease, you really can’t go wrong with Brownie Bottom Mini Cheesecakes. Their perfect blend of rich brownie and creamy cheesecake creates a mouthwatering treat that’s sure to bring a smile to everyone’s face. Trust me, once you try these, they’ll quickly become your go-to dessert for any sweet craving.
Related Posts
Print
Brownie Bottom Mini Cheesecakes
- Prep Time: 15 minutes
- Cook Time: 20 minutes
- Total Time: 2 hours 35 minutes
- Yield: 24 mini cheesecakes 1x
- Category: Desserts
- Method: Baking
- Cuisine: American
- Diet: Gluten Free (if using gluten-free brownie mix)
Description
Brownie Bottom Mini Cheesecakes perfectly combine the fudgy richness of brownies with the creamy smoothness of cheesecake in bite-sized treats. These decadent desserts are easy to make with simple pantry ingredients, customizable to your taste, and ideal for any occasion with their delightful dual texture and portable size.
Ingredients
Brownie Base
- Brownie mix (amount as per package or homemade recipe)
- Optional: Chopped walnuts or pecans (for nutty twist)
- Optional: Mini chocolate chips (for extra chocolate flavor)
Cheesecake Filling
- 8 oz (225g) cream cheese, room temperature
- 1/3 cup (65g) sugar
- 2 large eggs, room temperature
- 1 tsp vanilla extract
- 2 tbsp sour cream or heavy cream
Instructions
- Prepare the Brownie Base: Mix your favorite brownie mix according to the package instructions or your homemade recipe. Spoon the batter evenly into a greased mini muffin tin, filling each cavity halfway to create the perfect brownie base.
- Make the Cheesecake Filling: In a separate bowl, beat the room temperature cream cheese until smooth. Add sugar, eggs, vanilla extract, and sour cream (or heavy cream). Mix until fully combined and creamy, avoiding any lumps.
- Assemble the Mini Cheesecakes: Carefully spoon the cheesecake filling over each brownie base in the muffin tin, filling almost to the top but leaving some space for slight rising during baking.
- Bake to Perfection: Bake the mini cheesecakes at 325°F (163°C) for 18–22 minutes, or until the cheesecake layer is set but still slightly soft in the center. Avoid overbaking to maintain a creamy texture.
- Cool and Chill: Let the mini cheesecakes cool completely at room temperature. Then transfer them to the refrigerator to chill for at least two hours before serving for the best flavor and texture.
Notes
- Use room temperature cream cheese and eggs for a smoother, lump-free cheesecake filling.
- Don’t overfill the muffin cups; leave space to prevent overflowing during baking.
- For extra creamy results, bake the mini cheesecakes in a shallow water bath.
- Test for doneness: The cheesecake should be set around the edges but slightly jiggle in the center.
- Store mini cheesecakes in the refrigerator to keep fresh and maintain texture up to 4 days.
- Freeze wrapped mini cheesecakes for up to 2 months; thaw overnight in the fridge before serving.
- Warm leftovers gently at room temperature or briefly in the microwave on low power to preserve creamy texture.
Nutrition
- Serving Size: 1 mini cheesecake
- Calories: 150
- Sugar: 12g
- Sodium: 90mg
- Fat: 9g
- Saturated Fat: 5g
- Unsaturated Fat: 3g
- Trans Fat: 0g
- Carbohydrates: 15g
- Fiber: 1g
- Protein: 2g
- Cholesterol: 45mg
Keywords: brownie cheesecake, mini cheesecakes, bite-sized desserts, brownies, cheesecake, gluten-free dessert, easy dessert, party dessert, portable sweets